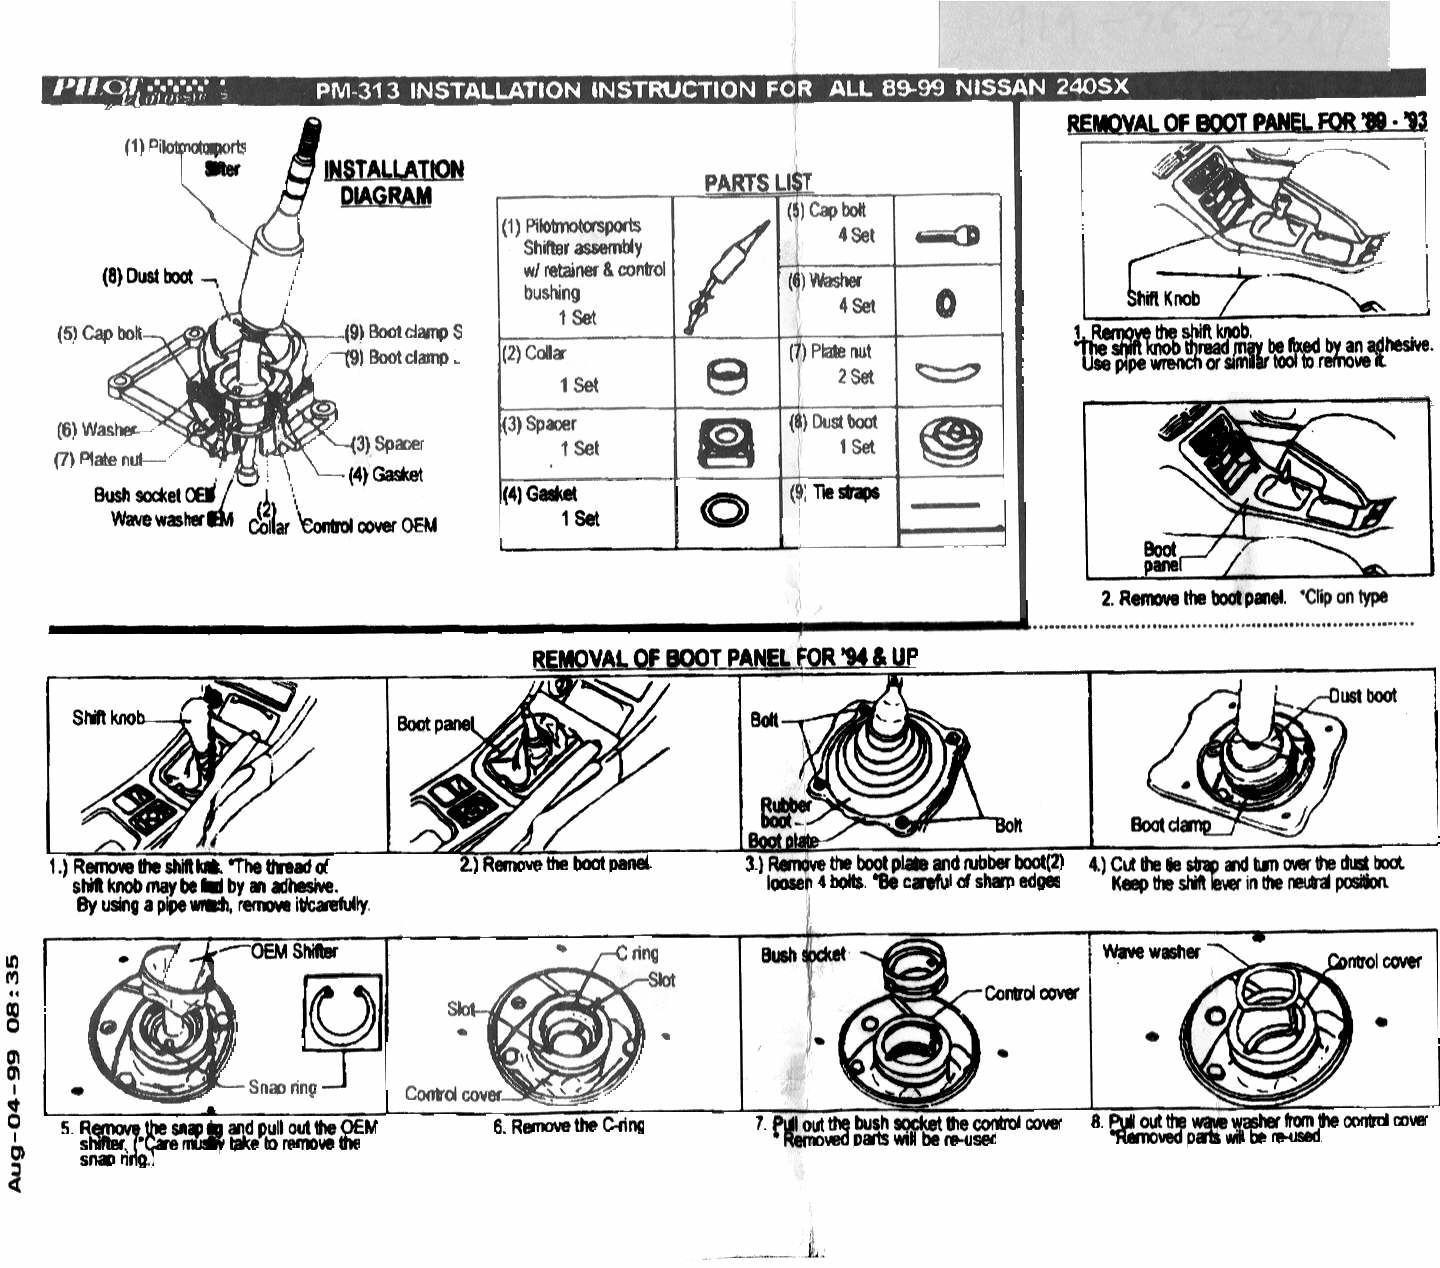
Pilot Motorsports--the official install manual for the short shifter
Official Name (according to PM)
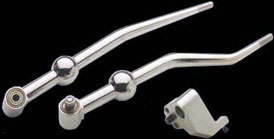
1) PM SHIFTER: the PM actual shift LEVER
2) COLLAR: the round aluminum sleeve that came w/the PM shifter.
3)SPACER: the square machined aluminum piece that came with the PM shifter. It has 4 screw holes on the corners, and a round hole in the middle of it.
4)GASKET: the thin round paper ring (from PM)
5)BOLT: umm-the bolts that came w/the PM shifter
6)WASHER: umm-the lock washers that came w/the PM shifter
7)PLATE NUT: the 1/2 moon shaped metal arcs that have 2 nuts welded to them at each end of the plate.
8)DUST BOOT: the inner boot (the one with the "F ->" on it.
9) TIE STRAPS: the zip ties that came w/the PM shifter
10)OUTER BOOT: ribbed rubber boot that has a metal ring around the fat end of it. It's visible when the console is removed. It is fastened w/4 10mm bolts.
11)SNAP RING: the round snap ring with 2 holes on it. It is removed with snap ring pliers--or a good set of needle nose pliers. When it is removed, the OEM shifter assembly will come out (note: this will not be re-installed)
12)C-RING: The 2nd retaining ring. This one does not have the 2 holes. It is trickier to remove. When this is removed, the oem BUSH SOCKET (SEE #13) can be removed. (note: this will not be re-installed).
13)BUSH SOCKET: OEM item-- It is the plastic socket that the ball of the shifter rest in. It has 2 metal rods in it which match up to 2 grooves on the ball of the shifter assembly. The BUSH SOCKET has a WAVE WASHER (SEE #14) below it.
14)WAVE WASHER: more like a spricg. It is below the BUSH SOCKET and can be removed when the BUSH SOCKET is removed.
15)CONTROL COVER:THe oem cover that caps off the transmition. It is rectangular in size and has 6 bolts securing it. The CONTROL COVER also includes the round cylinder that is connected to it (this will never be removed!!)Install:
CONSOLE REMOVAL:
1) Remove the shift knob (twists off c-clockwise)
2) remove the console- (includes leather boot). It simply pulls off--It is held on by spring tentioned clips.
REMOVAL OF OEM SHIFT LEVER--AS WELL AS PREPARING FOR PM INSTALL
1) Uncrew 4 10mm bolts retaining the OUTER BOOT(#10) and remove the OUTER BOOT.
2)Cut the Zip Ties that are securing the DUST BOOT(#8) and turn over the boot from the bottom side so you can access what is under it.
3)Remove the SNAP RING(#11) using snap ring pliers or a good set of needle nose, and pull out the OEM shift lever. (the snap ring will not be re-installed---this doesn't mean destroy it trying to remove it!)
4)Remove the C_RING(#12) using any tools you deem necessary--(the c-ring will not be re-installed---this doesn't mean destroy it trying to remove it!)
5)Pull out the BUSH SOCKET(#13) from the CONTROL COVER(#15). (removed part will be re-used---so be careful)
6)Remove the WAVE WASHER(#14)fromt he CONTROL COVER(removed part will be re-used---so be careful)
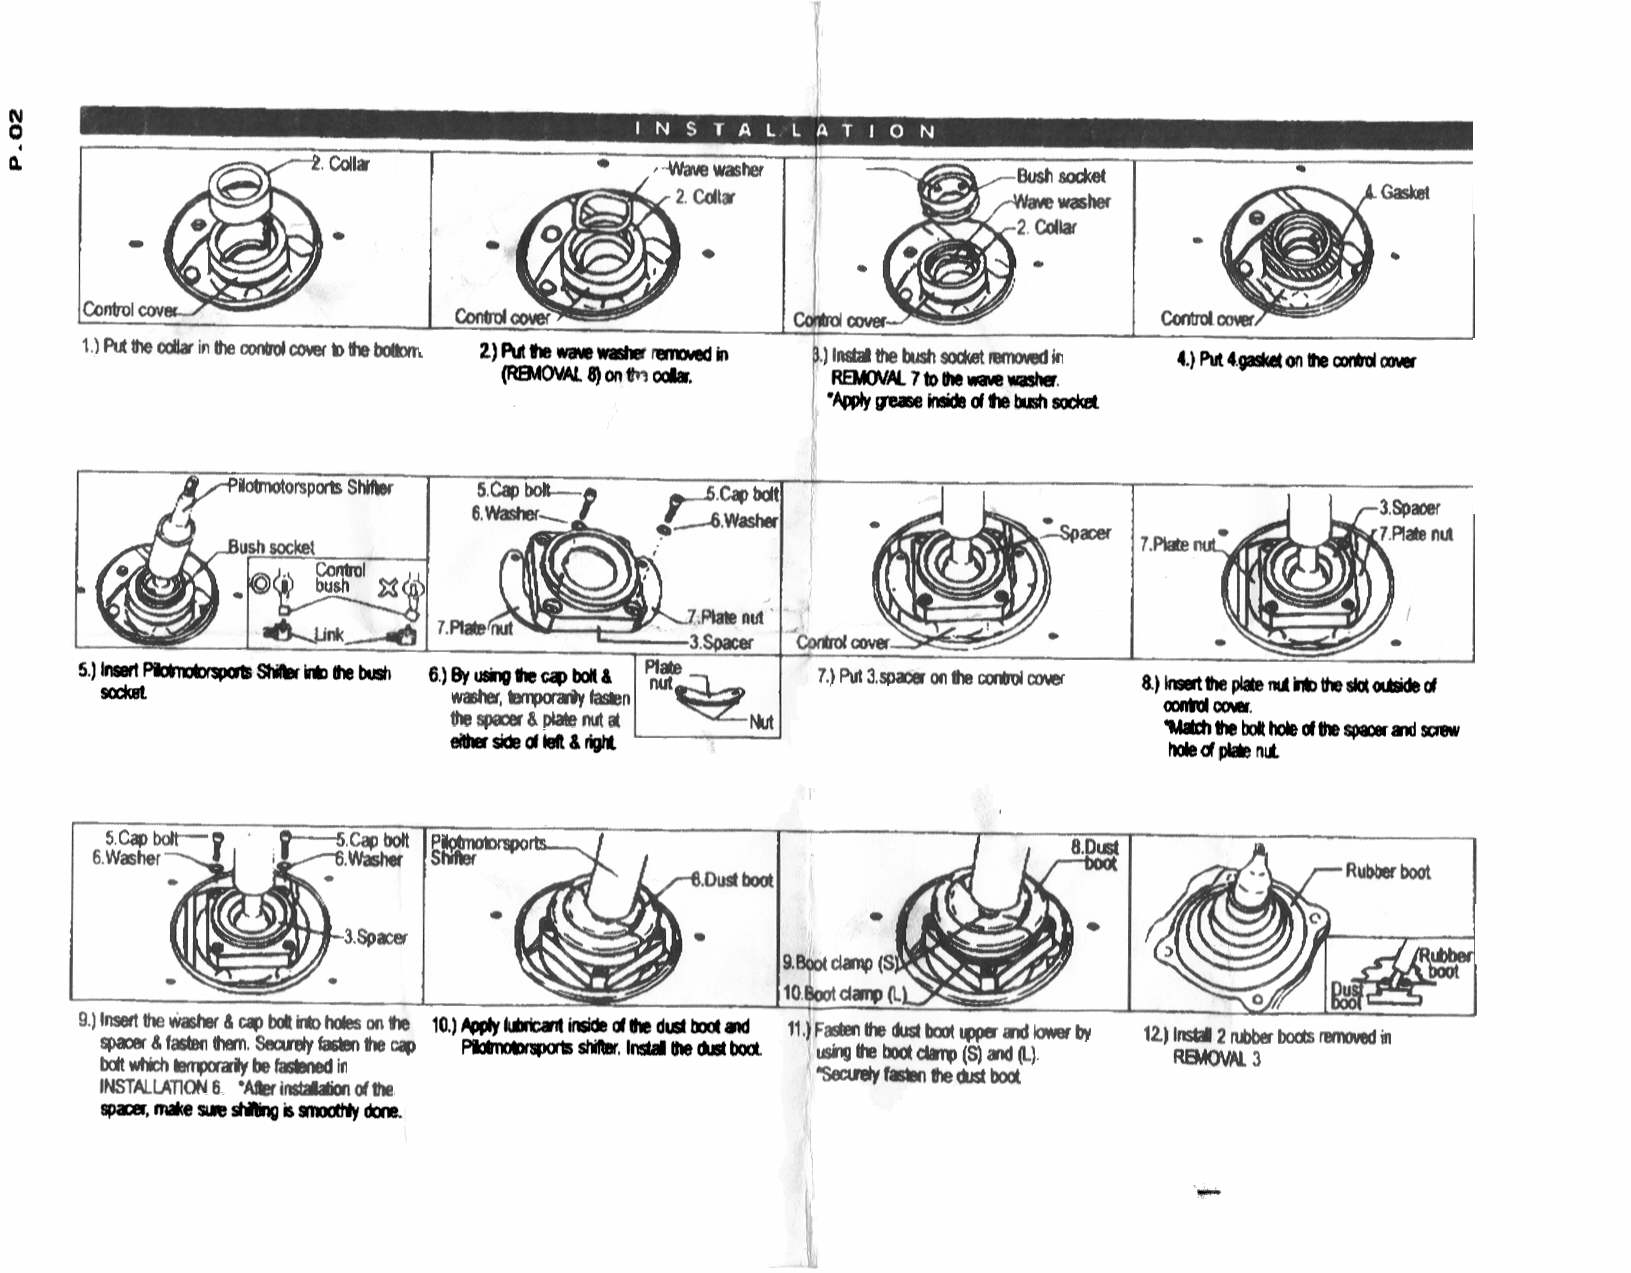
INSTALLATION OF THE PM SHIFT LEVER
1)Place the COLLAR(#2) in the bottom control cover (where the BUSH SOCKET WAS)
2)Place the WAVE WASHER on top of the COLLAR
3)Place the BUSH SOCKET on top of the WAVE WASHER
4)Place the GASKET(#4) on the control cover (this will surround the recently installed BUSH SOCKET, WAVE WASHER, AND COLLAR. It will not touch any of these pieces.
5)Insert the PM SHIFTER(#1) until the PM SHIFTER'S ball rests on the BUSH SOCKET, making sure that the small plastic bushing at the bottom of the PM SHIFTER enters the similarly sized hole in the transmision (in the control cover hole--at the bottom)
6)Secure the SPACER(#3) TO THE CONTROL COVER using the the PLATE NUTS(#7), CAP BOLTS(#5), and WASHER(#6).
Here's how the PLATE NUTS attatch to the spacer.
Here's the easiest way I have to expalain it. If you took the Plate nuts and place the PLATE NUTS face down (nut-side facing down). Place them so the nuts mimick the bolt pattern on the spacer. For ease of installing, fasten (partially) 1 of the 2 bolts on each of the PLATE NUTS. ovbiously using the CAP BOLTS AND WASHERS. next place the SPACER/PLATE NUT assembly on the CONTROL COVER (put shift lever through SPACER's hole). Next swing the PLATE NUT so they are resting in the groove in the CONTROL COVER (this grouve was originally where the bottom lip of the DUST BOOT was secured. The nut side should face down, making the side facing up the smooth side with no nuts protruding
9) Insert the remaining (2) CAP BOLTS and WASHERS and securly fasten the cap. After fastening, check to make sure shifter moves smothely (overtightening will cause un-smooth shiftlever movement).
10)Slip the DUST BOOT (the one that came with the PM shifter) over the top (shift knob side) until the narrow end of the DUST BOOT clears the fat part of the PM lever. Use some lubricant (I used Vaseline) to assist in sliding the boot over the fat shift-lever---It is not easy to streatch the boot that wide---be careful!).
11) Secure the TIE STRAPS Supplied by PM over the top (narrow) and bottom (fat) side of the dust boot (like it was on the oem shifter.
12)Re-install the RUBER BOOT
13)Re-install the Consol
DONE!!!!
Original papers -
pmsshift.jpg
PMSShift2.jpg
Pilot Automotive Info:
Web Site: http://www.pilotautomotive.com/pilotmotor/racing_accessories/Index.htm
E-Mail: [email protected]