Nitrous Oxide
NOS Direct-port Wet Kit
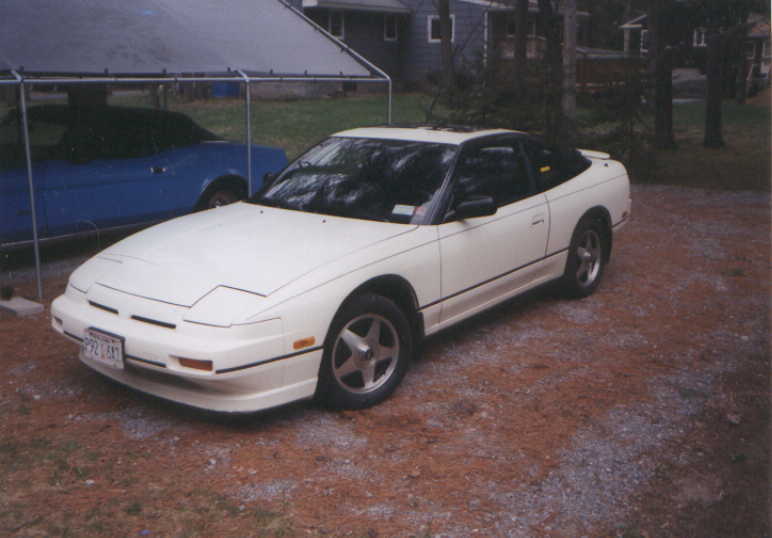
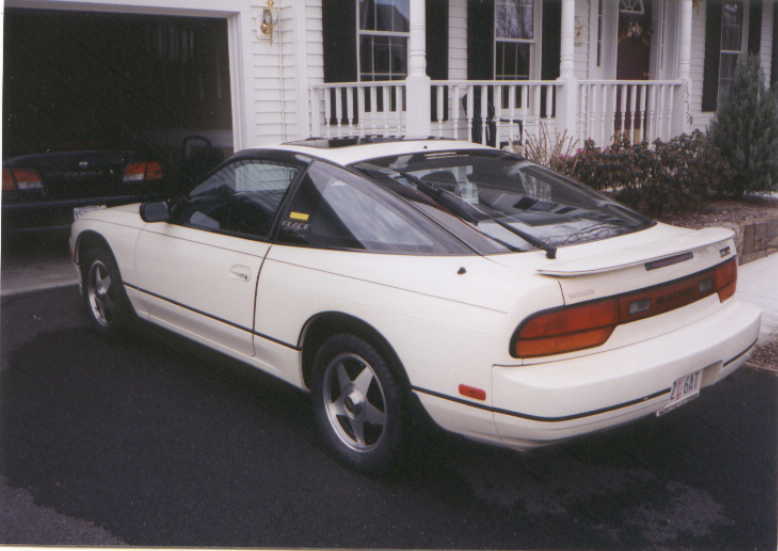
Install on a 1990 Nissan 240SX SE
2.4 Liter SOHC KA24E Engine
Tools / Supplies
Metric sockets and open end wrenches in various sizes and ratchet drive extensions
Gasket scraper / razor blades
Screwdrivers
Rags
Shop Vac
Compressed air
Torque wrench
Factory Service Manual or other manual
Coolant drain pan
Coolant
De-Greaser
Gasket Remover
Parts
NOS Kit:
4 Fogger nozzles
2 Solenoids (NOS & Fuel)
1 throttle micro-switch (trigger)
1 Arm / Disarm switch (inside)
8 lines with fittings (4 NOS & 4 Fuel)
Funnel Jet NOS & Fuel jets
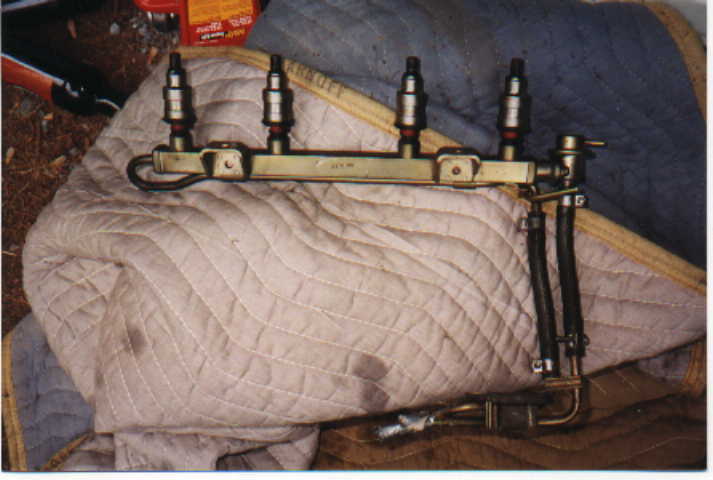
2 distribution blocks
NOS line to trunk
Fuel line ‘T’
Tubing bender
Instruction booklet
NOS 10 lb. Bottle
Bottle mounting brackets
Relief tube (not used)
NOS pressure gauge
NOS filter
Other Parts:
Fuel Injector seal kits x 4
Intake manifold-to-head gasket
Collector-to-intake manifold gasket
Fuel filter
Fuel line 4’
Replacement parts:
Blue nuts (4)
Compression fittings – jet end of tube (8)
Compression nuts – dist. block end of tube (8)
NOS filter
Keep in mind – this is a SOHC 1990 240SX SE with cold air intake, underdrive pulley, and is running in top-notch condition after a recent tune-up. The install on a DOHC is similar, but not exact. Especially the mounting location advice.
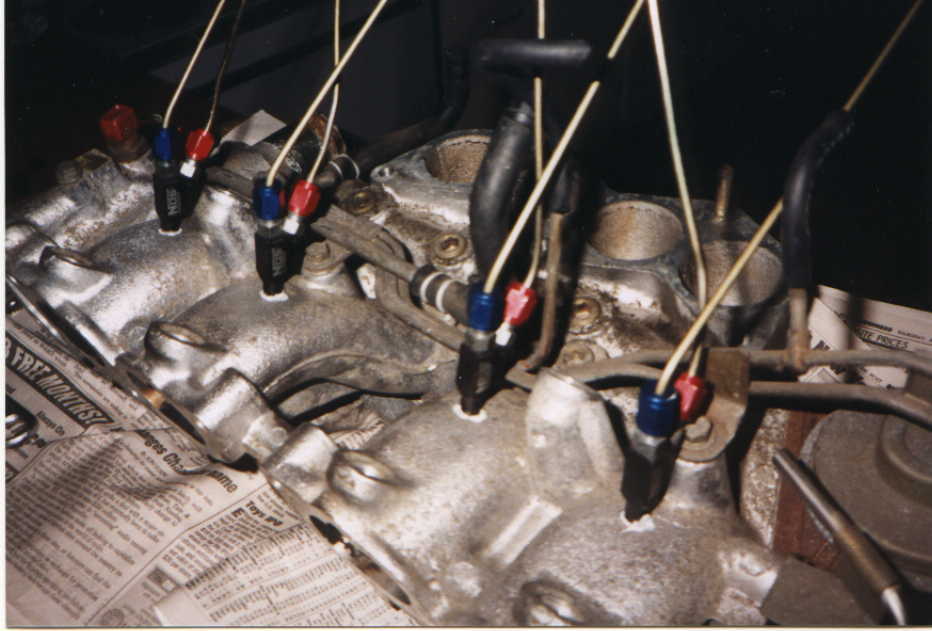
Test fit Nozzles WITH the jets inserted AND the Blue and Red Compression nuts attached. I fit my nozzles right behind the 4 injectors, but it is a real tight fit there. I had to screw the nozzles in at least twice as far as they needed to be just to clear the fuel rail. I also had to shave a little off of the blue compression nuts to clear the fuel rail. If I had test fit with the nuts on, I would have seen that I should have angled the nozzle holes toward the passenger side a little to make the clearance better. The last one towards the back of the engine is tight no matter what you try. I’d suggest moving or angling it away from the vacuum line assembly bolt hole. It won’t be in perfect position, but it should be better than my .02 inch clearance. NOS sells 90 degree nozzles (~$40) so you could turn this one for better clearance. They might swap one of those into a kit for you.
Relieve Fuel Pressure by pulling the fuel pump fuse in the fuse box by the battery, removing the fuel filler cap (don’t forget this – gas will pour out for a while if you forget), then start the car and let it run until it dies.
Disconnect battery cables.
Drain coolant. (Perfect excuse to flush your cooling system!)
Remove all electrical connections to the intake manifold and collector. Mark them so you know which is which for re-assembly. Be careful with the electrical plugs that use a wire clip to hold them in. I had several of the plastic plugs crack, one so severely that the wire clip was not holding much, I taped it in. Luckily that one was not an injector!
Loosen the PS belt and remove the 3 mounting bolts for the power steering pump and move the pump itself out of the way just enough to get to the head bolt that is hiding behind it.
Remove all vacuum and coolant hoses that connect to the manifold. Mark them for re-assembly. There are several tough ones under the radiator hose near the power steering pump.
Remove the collector from the manifold. There are 5 bolts, easy to get to. Pry gently to get it to break free from the manifold. There are several vacuum lines and coolant hoses to disconnect including a blind one underneath the intake runners.
Remove the bracket that supports the intake assembly. You will have to remove the oil filter to get the bracket totally out of the engine compartment, it may not be necessary to remove the bracket totally, but I did. There are 2 bolts up top and 1 down below, just run your finger down until you find it, then use an extension to remove the bolt. One other bracket also connects to it with 2 small bolts.
Detach the EGR tube from it's socket in the exhaust manifold. Mine was not stuck at all, to my relief!
Remove the intake head bolts in the proper order (detailed in the book).
Remove all the connectors and hoses you missed. I missed a lot.
Remove Intake Manifold. Drain any residual coolant and fuel.
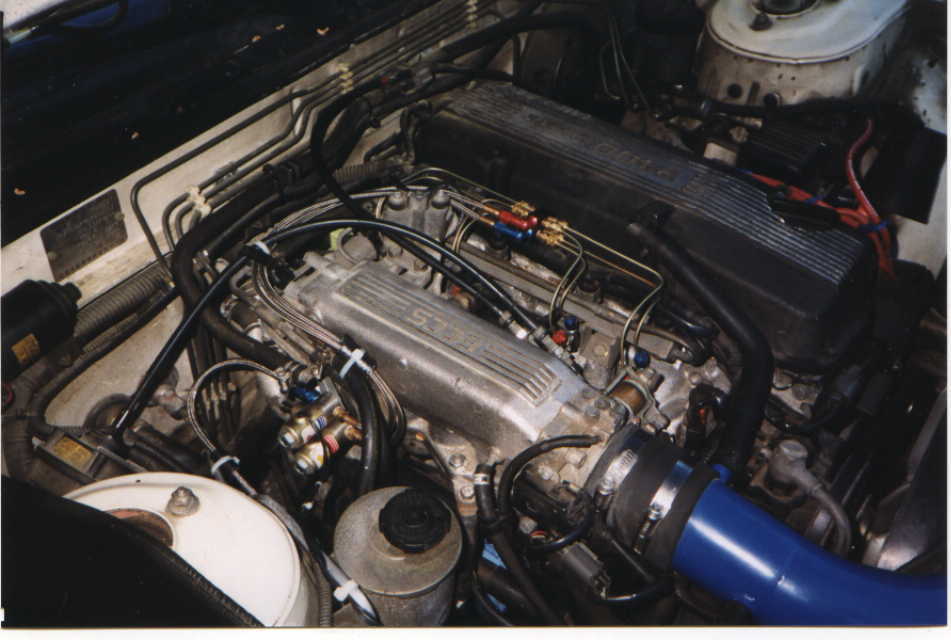
Remove Fuel Rail and injectors from manifold. Gas will leak out so be ready.
Drill holes in runners. Aluminum is very easy to drill, nervousness aside. Make sure you watch the angle you are drilling!
Tap Holes. Don’t go all the way through, only tap as far as necessary to clear the holes in the Fogger Nozzles. Inserting them farther (which I had to do) will block some of the airflow. I estimate I’ve lost a good 2-4% of the cross section of the runner due to the over-inserted nozzles. (I had no choice – the fuel rail was not going to clear unless I got the nozzles in an extra 1/8 inch)
Remove gasket material from the head, manifold-to-head surface, manifold-to-collector surface, and collector. I used a Gasket Remover spray to soften and break up the old, hardened gaskets. This was the worst part of the whole job. What a pain in the ass!
Clean intake collector, throttle plate and manifold runners with carb cleaner (brushes optional), soak and repeat. Let dry. (Something made my ‘sine-wave throttle’ which used to go up and down between 600 and 800 rpm go away, and I think this was it.)
Install Fogger Nozzles in holes, using a thin coat of Teflon paste, and tighten until at least 4 threads are in.
Clean intake runners with compressed air (best) or shop vac.
Choose jets and insert into Fogger Nozzles. I used 22 NOS / 16 Fuel for approx. 80 HP on the advice of the previous 240SX DOHC owner. I could switch to 24 NOS / 16 Fuel for 100 HP in the future.
Install lines, ferrules and compression nuts, tighten compression nuts. I left the lines unattached and pointing up because I wanted to be certain of the positioning and fit of the distribution blocks after the manifold was reinstalled.
Replace injector o-rings and gaskets. These are $2 per injector and it takes 1 minute each.
Install fuel rail onto manifold. Make sure the NOS components are not touching ANYTHING. The fuel rail must fit EXACTLY as it is supposed to or the fuel will leak! If compression fittings touch the fuel rail, shave them off using a high-speed Dremel-type tool. The aluminum cuts easy, be real careful not to nick the lines! Be careful with dirt and metal shavings if you do this. I cleaned out the runners again (after I shaved the fittings) with compressed air.
Clean the area around the head - old gasket, chemical goop, dirt, grease etc.
I used a shop vac with a piece of fuel line attached on the end to give a final cleaning of the valve area inside the head, the intake runners, and the area where the NOS Nozzles poke through the wall of the runner….And Crossed my fingers.
Install new gasket and manifold onto engine, torque bolts to 16 lbs following the sequence in the book.
Reinstall:
Bracket and oil filter
Collector and Throttle body, using new gasket and torque following the sequence in the book.
All the hoses and vacuum lines
EGR tube to exhaust manifold with some Never-Seeze
Power steering pump and belt
All electrical connectors
Fuel lines (I waited to install the NOS stuff last to ensure the engine actually ran!)
Refill coolant, and bleed.
Connect Battery.
Connect throttle cables and cruise control cable.
I placed duct tape over the NOS and Fuel tubes as they stuck up out of the engine so they wouldn’t suck anything in.
Start the engine. Mine fired right up and ran great. What a relief!
Check for fuel leaks around the injectors and the fuel rail and the filter and lines.
Test drive to check that all sounds OK, acceleration is normal, etc.
NOS plumbing
I located the distribution blocks right between the edge of the valve cover and the throttle cable area. Bend the tubes with the NOS tubing bender "for that Professional Look". Mark the cuts at the end of the threads on the distribution block fittings and carefully cut the tubes. Be sure you are cutting the correct side! And don’t nick the other tubes. I used a high rpm Dremel-like tool with a cutting disk. It worked great to cut the lines and shape and deburr the cut ends. I reamed the ends out with a sharp awl.
Attach the cut tubes to the distribution blocks, pressing them tightly in all the way while tightening the compression fittings.
I attached the solenoid hanger to the lower of the two bolts holding the fuel line bracket to the collector.
I ran the braided NOS and Fuel lines from the solenoids along the fuel lines over through the BPT(?) thing and attached them to the distribution blocks. Do not tighten yet, you need to purge the NOS line. I used pieces of fuel line and a tie-wrap over the braided lines when they could rub and damage anything.
Relieve the fuel pressure again, and remove the fuel filter and replace it with the new one. Cut the fuel line and attach the NOS ‘Tee’ in an appropriate place, tighten the clamps. Attach the other end of the new fuel line to the fuel solenoid with a clamp. Make sure the solenoid fuel filter is tight.
Start the car and make sure no fuel is leaking out from the hoses and connections.
Proceed to the trunk!
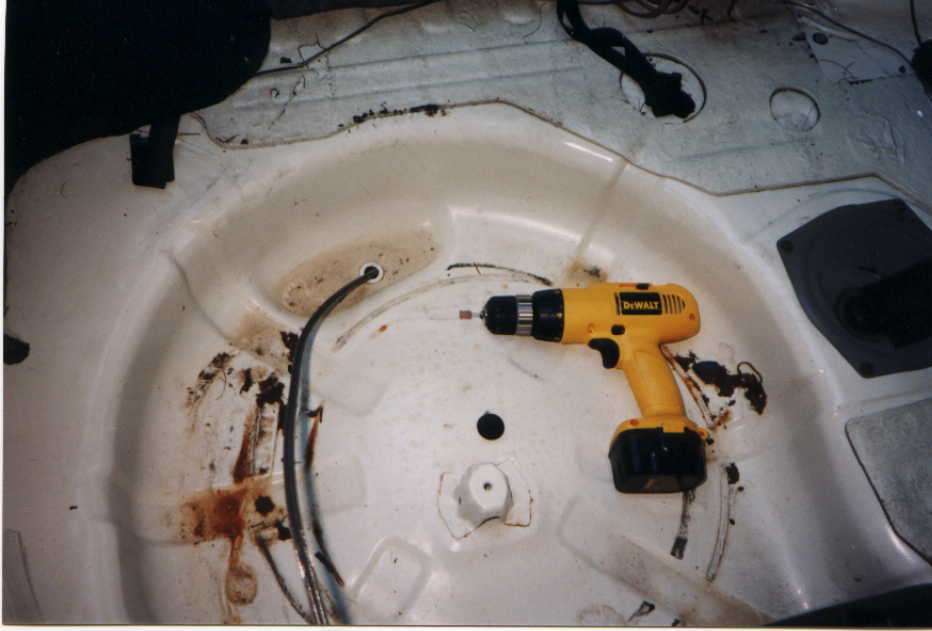
Jack up the passenger side of the car behind the front wheel and set jack stand. Pull the carpet up and under the spare wheel you will find a black rubber plug positioned perfectly to run the NOS line through. Remove the plug and shine a flashlight through so you can see where it is from underneath. It’s behind a sort of shield for road debris, I think. I cut the center of the rubber plug out and ran the line through it making a nice grommet. I have to check to see how well this is holding up.
From there I ran the line up front along the fuel lines, leaving extra line for movement where it was needed. Cover the braided line with a piece of rubber fuel line and secure to the steel lines at appropriate intervals. This part was easy. Go all the way up until you reach the engine compartment following the steel lines.
Don’t attach this line to the Nitrous solenoid yet, you still have to purge.
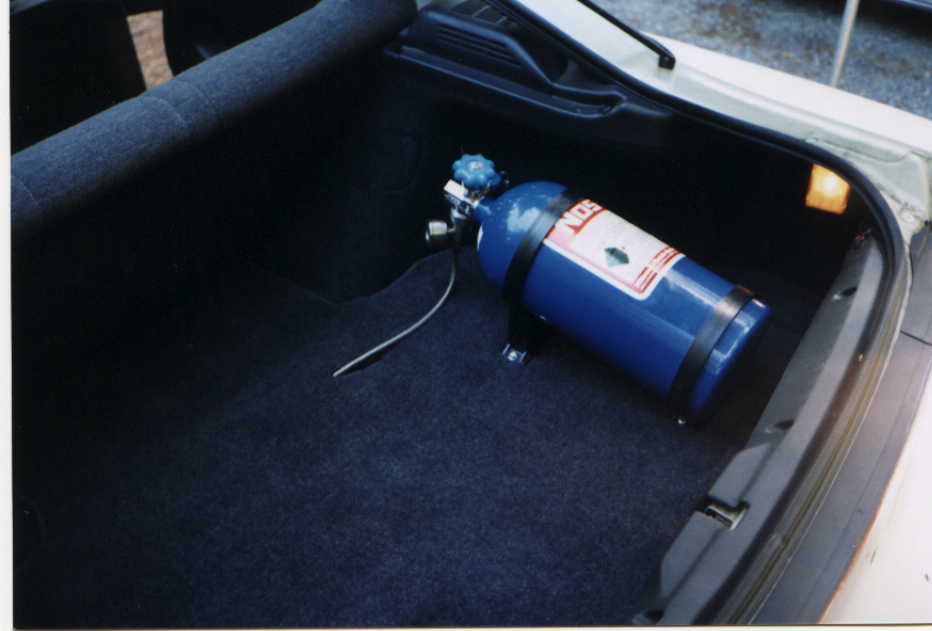
To mount the bottle, I used a piece of plywood under the carpet which I attached using brackets to 3 existing mounting screws in the trunk. It’s pretty sturdy. Put the carpet back and position the bottle brackets. Mount the brackets using 4 short screws through the carpet down into the plywood. Don’t go too far, the gas tank is down there! Mine is very solid, I can really shake the tank without any problems.

Feed the line through the nice hole in the carpet that was there for the sunroof hold-down straps. Or cut a hole if you don’t have this.
Fill the NOS bottle. I paid $4.70 per lb, or $51 after tax for 10 lbs.
Mount NOS bottle into the brackets and attach the line. Secure the engine end of the line, and crack open the NOS valveBRIEFLY to purge the line. Be careful, 1000 lbs is a lot of pressure. I heard the noise echoing off the hills after I purged.
Attach the NOS line to the NOS solenoid and tighten. Open the tank valve and listen for leaks. Fix any leaks. Remember: nothing on the AN fitting threads! Only use Teflon paste on the nozzles into the intake runner and the compression fittings going into the distribution blocks, the rest should be dry.
Keep the tank valve closed.
Electrical
I’m not going to detail this, it’s all in the instructions and very simple. There is an arming switch that goes inside and a micro-switch with a bracket that I mounted using a bolt from the throttle cable bracket. It really was simple. At WOT, the backside of the throttle cable guide/connector rotates around and hits the micro-switch.
Testing
Close the bottle valve.
Turn the arming switch on and manually press the throttle switch. You should hear a click and the Nitrous will empty out of the line into the cylinders. CAUTION: THIS IS BAD!!!!! Normally you will not have discharged nitrous into the engine if it is not running. Starting the engine with the cylinders full of nitrous is a quick way to spectacularly destroy your engine. Get the Nitrous out of the engine by removing the coil wire and cranking the engine over at least 15 seconds. I went a lot longer than 15 seconds.
When the nitrous is purged totally from the system, with the bottle valve closed and the engine off, you should not hear any gas hissing when you operate the solenoids manually. Now you can proceed.
Turn the arming switch off.
Start the engine, and check for fuel leaks at the ‘Tee’ and at the solenoid.
Rev the engine to 3000 rpm, turn the arming switch on, and manually operate the throttle micro-switch.
The rpm’s should decrease due to the suddenly very rich condition you have just created. My engine almost stalled. Release the micro-switch.
With the engine still running, it should recover from the rich condition quickly, rev it up a bit until the idle returns to normal.
Now with the engine idling, open the bottle valve in the trunk. There should be no change in the rpm’s of the engine.
Find a road and test it out! Don’t trigger the NOS until 3000 rpm, and watch out! Redline comes up very quickly now!
Results
OK, I was very nervous the first time I triggered the Nitrous. Who wants to see their hood bulge up or flames belch out of the engine compartment? Thankfully, the kit is a great sucess. I've blasted thru a whole bottle without any problems at all. It really is a surprising amount of power. It almost breaks the tires free at 3000 rpm in 1st when I hit the floor. The tach flys up to 6000 really fast! I've got to get some kind of protection, I think the rpm limiter cuts the (gasp!) fuel, but I think it's at 6500 or 6750, and I don't go above 6100-6150. The speed limiter at 118 has got to go. That's my next mod, installing a switch somewhere will allow me to eliminate it in 5th gear when I want to.
G-Tech Testing:
This car had an average hp (6 back-to-back runs on the same road at the same temp, average the results) of 132 back in January with the temperature at 30 degrees F. Mods were CAI and pully. Obviously, the low temp with the CAI really boosted this number!
Now, at 75 degrees F on the same road, with the addition of Magnecor 8.5mm wires and a full tune-up I am getting a depressing 117 average hp without Nitrous. With the Nitrous, I got 162 hp average at 75 degrees F. OK, that's a 45 hp to-the-wheels gain! It makes me want to go for more!!! But not without some kind of controller. Also, the nitrous is damn expensive. I seem to be getting about 7-10 runs on a bottle. That's about $4 to $4.50 per run. Looks like I will be saving it for the drag strip and I'll have to pick my victims on the road carefully.
| 30 degrees | 132 HP | CAI, Pulley |
| 75 degrees | 117 HP | CAI, Pulley, Magnecore 8.5mm wires, NGK plugs |
| 75 degrees | 162 HP | CAI, Pulley, Magnecore 8.5mm wires, NGK plugs with Nitrous (22/16 jets) |
| 75 degrees | 129 HP | CAI, Pulley, Magnecore 8.5mm wires, NGK plugs, Apexi N1, no Nitrous |
| 75 degrees | 180 HP | CAI, Pulley, Magnecore 8.5mm wires, NGK plugs, Apexi N1 with Nitrous (22/16 jets) |
I don't have a lot of faith in the G-Tech, but at least it is consistent.
October 1999 Update
So far, so good! I've blasted through 4 bottles, about one a month. Not a cheap thrill, but a good one. I beat my brother's 96 Integra GS-R, man that was sweet! He said 'Crap was coming out your tailpipe!', I replied 'You just haven't seen a race from BEHIND yet, have you?'. Heh heh heh. All in fun, but now he is getting a Jackson Racing Supercharger. Check out his install page
http://home.nycap.rr.com/ghjrsc/index.html
I've also got a NOS rpm limiter with a relay, but that goes on this winter along with a re-jet to 100hp, colder plugs, fuel pressure gauge and retarded timing. I think further races between us will come down to traction.
Later,
Jeff
Jeff Holden
June 1999